
Taking a closer look at one of our signature IKEA kitchen hacks
Level of difficulty: easy
This is one of our favorite IKEA kitchen hacks because:
- It’s inexpensive
- It’s easy to do
- You don’t have to cut any cabinets, so you won’t void your warranty
- You can use this cabinet hack to store just about anything
You have room for this hack in your IKEA kitchen if you have 18” of space between the countertop and the bottom of your 30” wide wall cabinets.
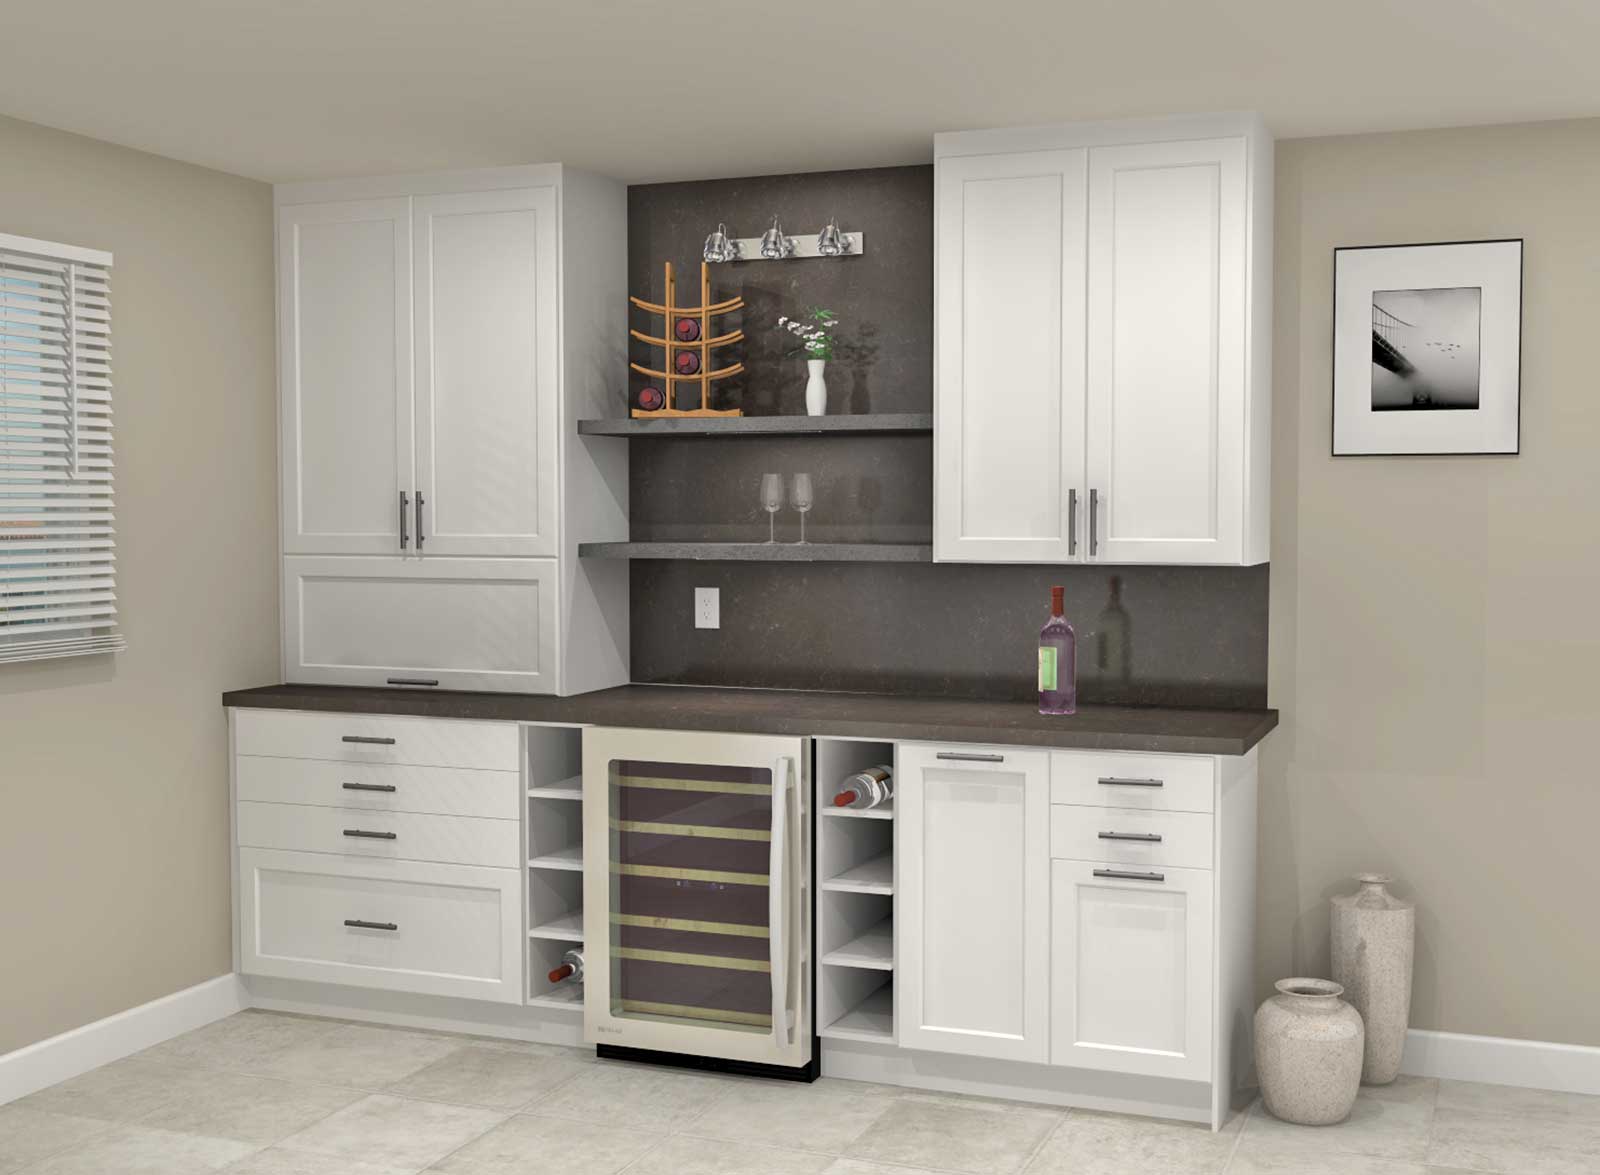
Basically, you flip a wall cabinet on its side, attach a door with a horizontal door hinge and voila! You have a concealed area on your countertop for storage.
How can you use this hack in your IKEA kitchen design?
We’ve added this hack into IKEA kitchen designs for people who wanted a cabinet for:
- A coffee station. You love coffee, but there’s no need to advertise or take up valuable counterspace. Hide your coffee pot, cups, sugar, and other accessories when they’re not in use.
- A post-workout station. Your protein window is only open for so long, bro! Store your Magic Bullet for your post-workout shakes, your water bottle, and your roll of quarters for the last part of your GTL routine.
- A breakfast bar for children. Saturday mornings should be for sleeping in, but little tummies are awake and hungry! Keep cereal, bowls, spoons, and granola bars here in easy reach so kids can serve themselves. When they’re done, they can clean up after themselves too. Your IKEA kitchen is for your whole family.
- A mail station. Install this cabinet near the entrance of your kitchen and you have a place to stash your mail and your purse. You can sort through the mail while you’re waiting for the pasta water to boil.
- A charging station. Make sure there’s an outlet behind this cabinet and then cut a hole in the back. Set up a power strip inside and you’re ready to charge your phones and tablets without wires being all over the counter.
- A medicine cabinet. Store your vitamins and supplements in this cabinet so you remember to take them with your meals. If you install a low MAXIMERA drawer at the bottom, you’ll be able to pull everything out and only grab what you need.
These are just the 6 ways we’ve seen customers use this cabinet. If you create this cabinet hack, let us know how you use it!
Why Design
with IKD?
Why Design with IKD?
This hack only works for some IKEA kitchen cabinet door styles
This hack only works for flat IKEA kitchen cabinet door styles with no wood grain effect. Why?
- You don’t have to match up seams
- You don’t have to match up the direction of the wood grain.
So, this hack works perfectly with these door styles:
- RINGHULT
- VEDDINGE
- JÄRSTA
- HAVSTORP
- BODARP
- KUNGSBACKA
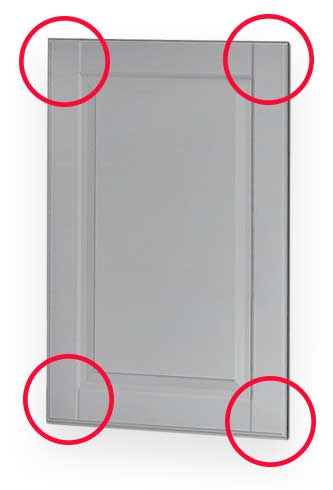
Now, there are other door styles we think work fine, but we’d be remiss if we didn’t point out that a seam will show. What do we mean by seam? Look at the image on the left.
Because you’re using a vertical door cabinet, these seams won’t point down. They’ll point sideways.
Personally, we don’t think this is a big deal, but, we do pay attention to detail and we’d want our customers to know.
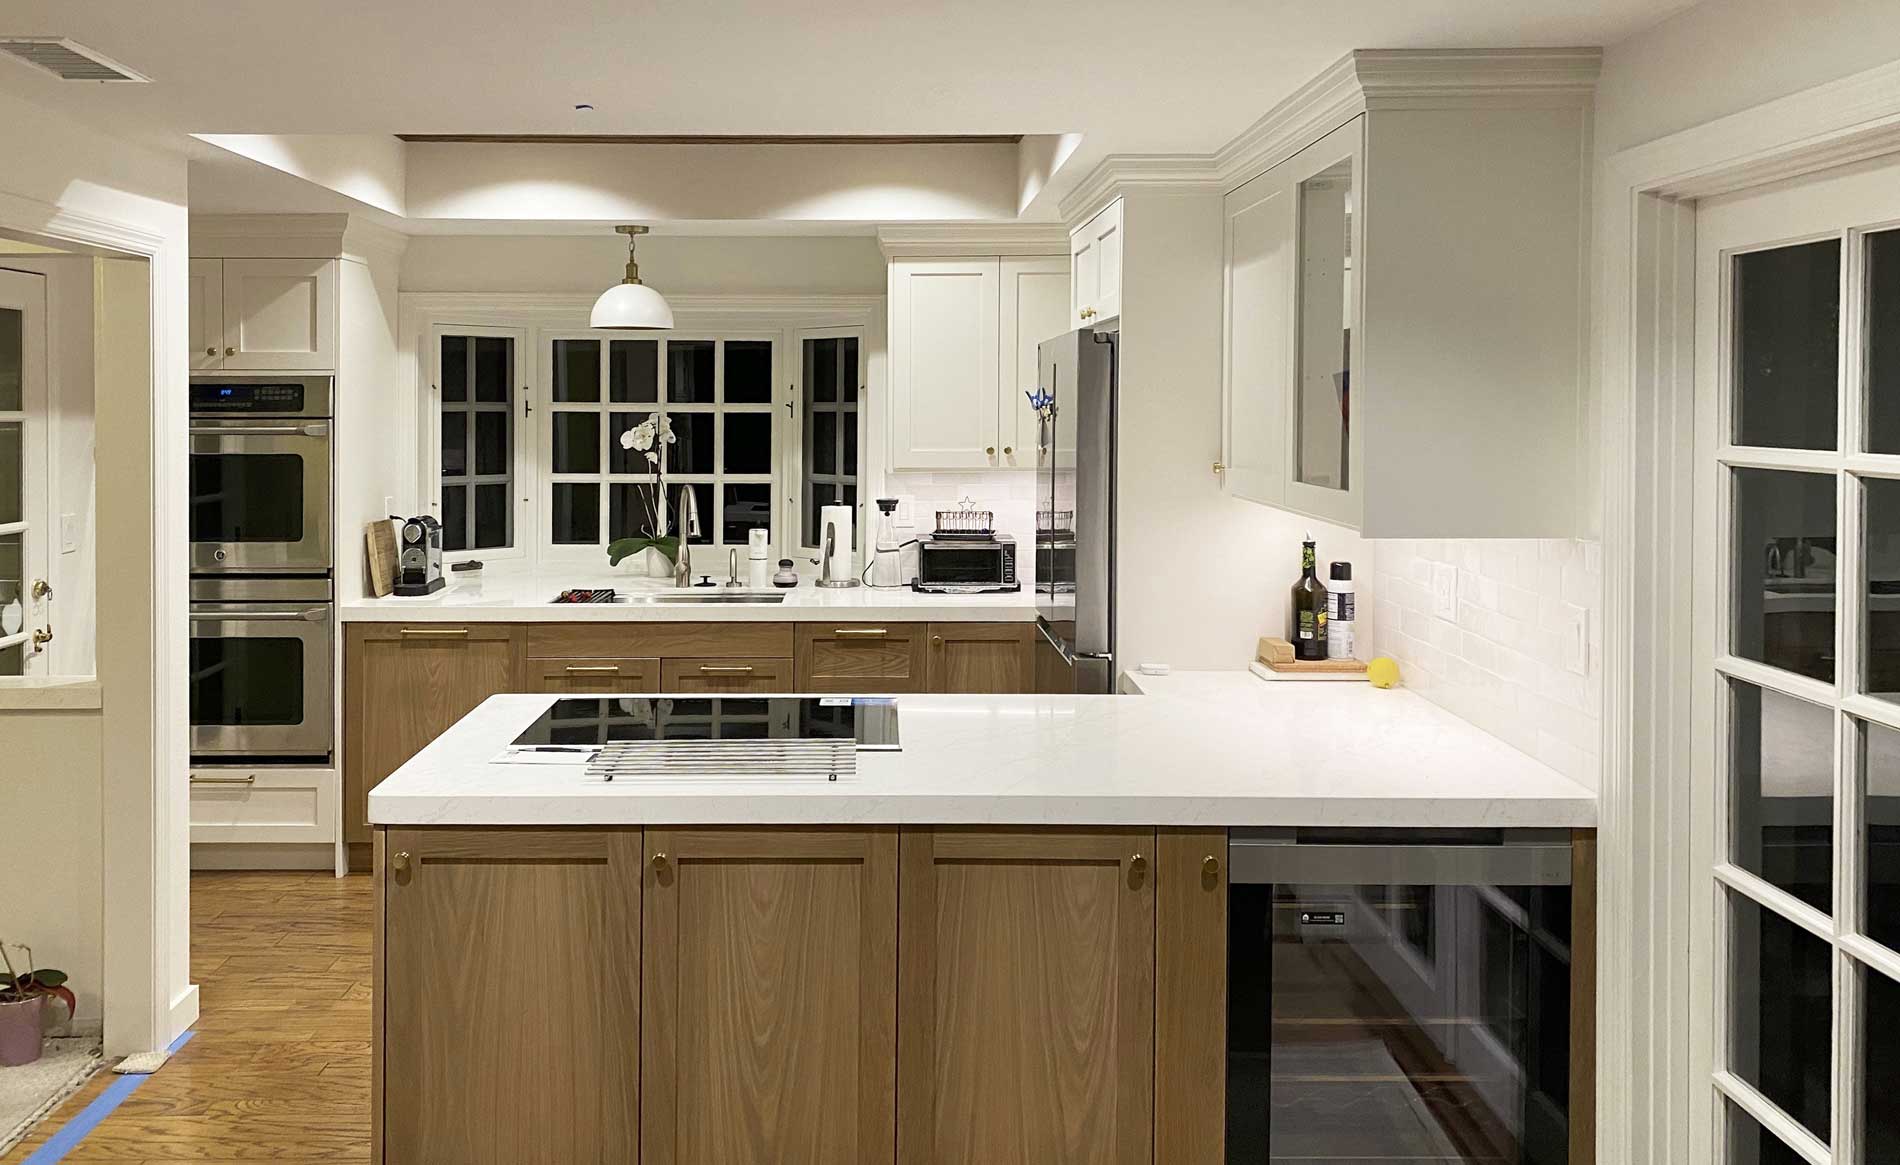
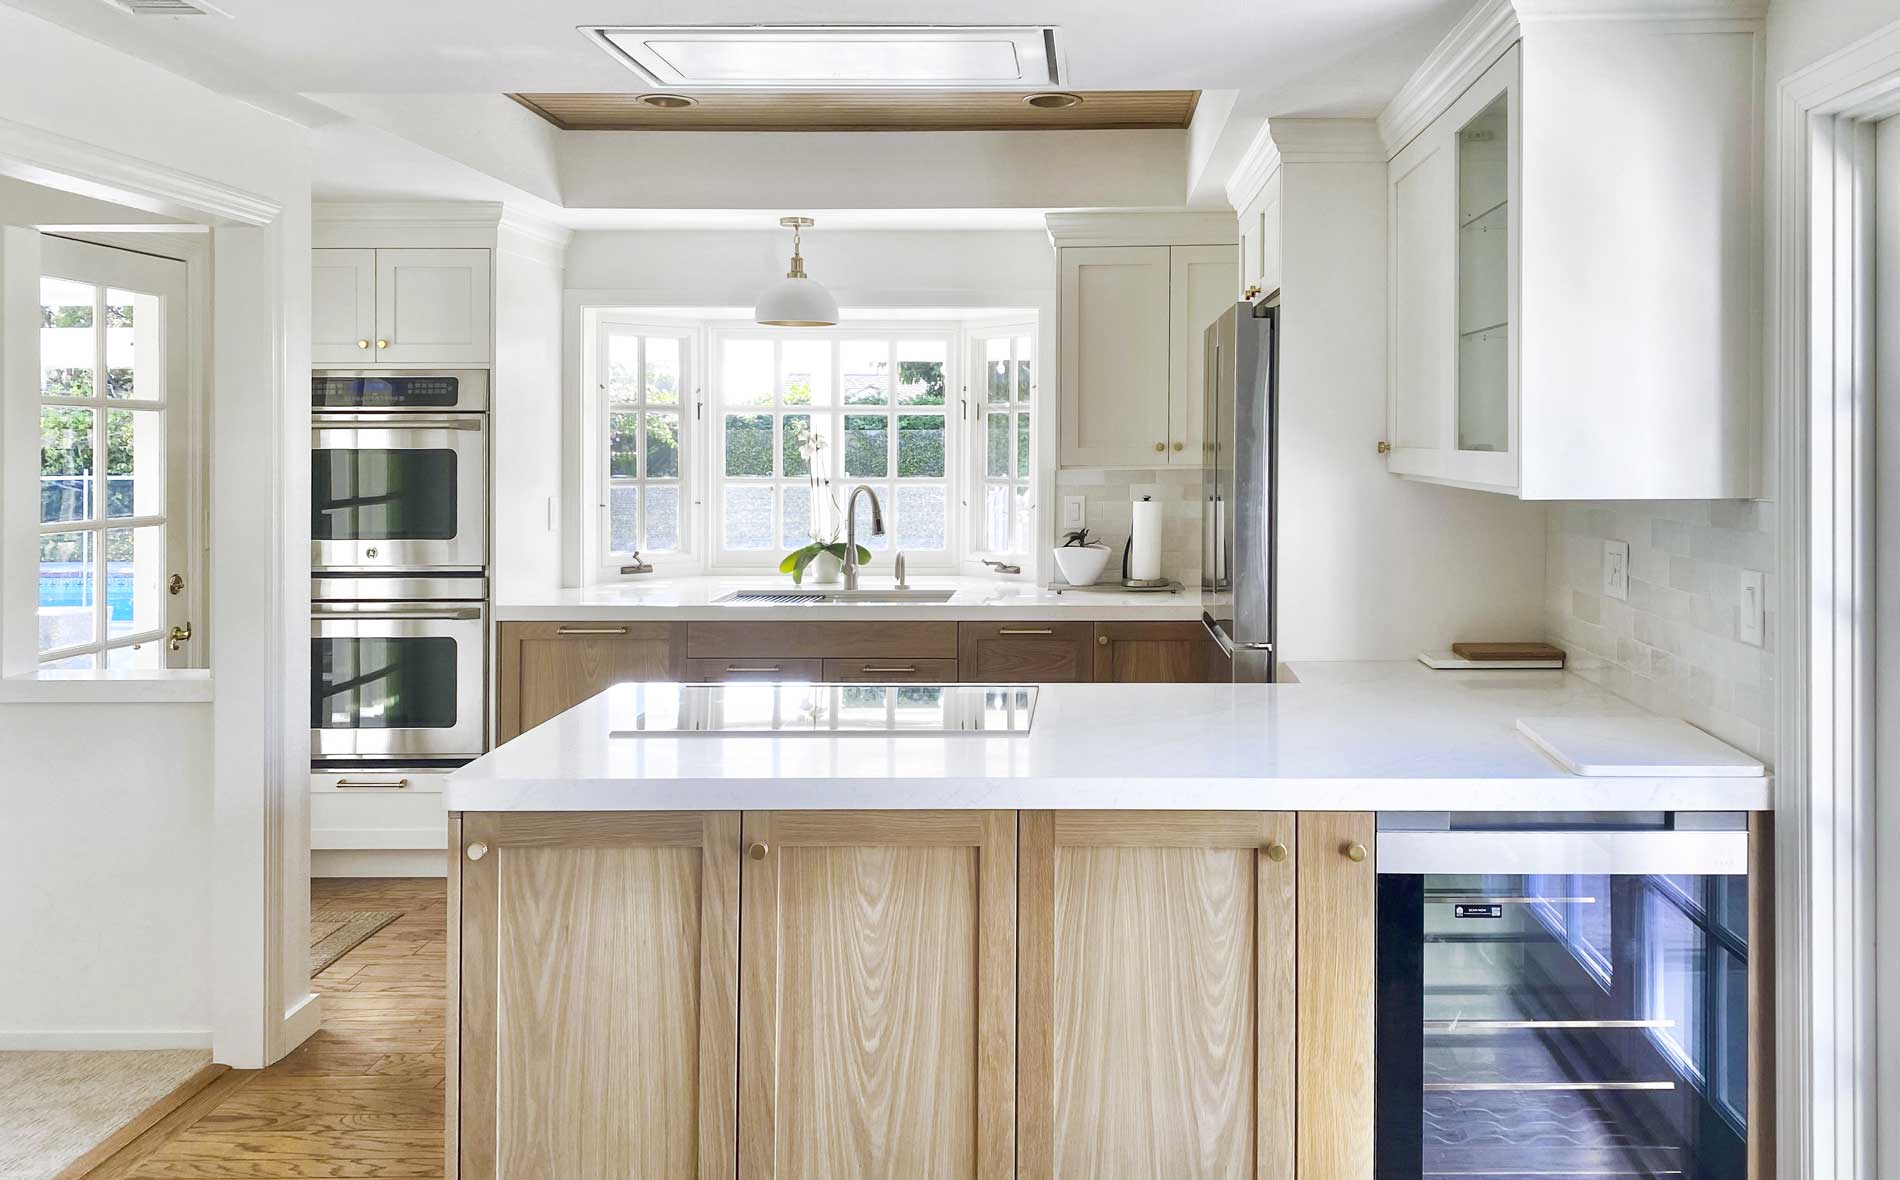
One of our customers used this hack and if you look really closely, you’ll notice the seam issue. Most people don’t. And it looks and works great.
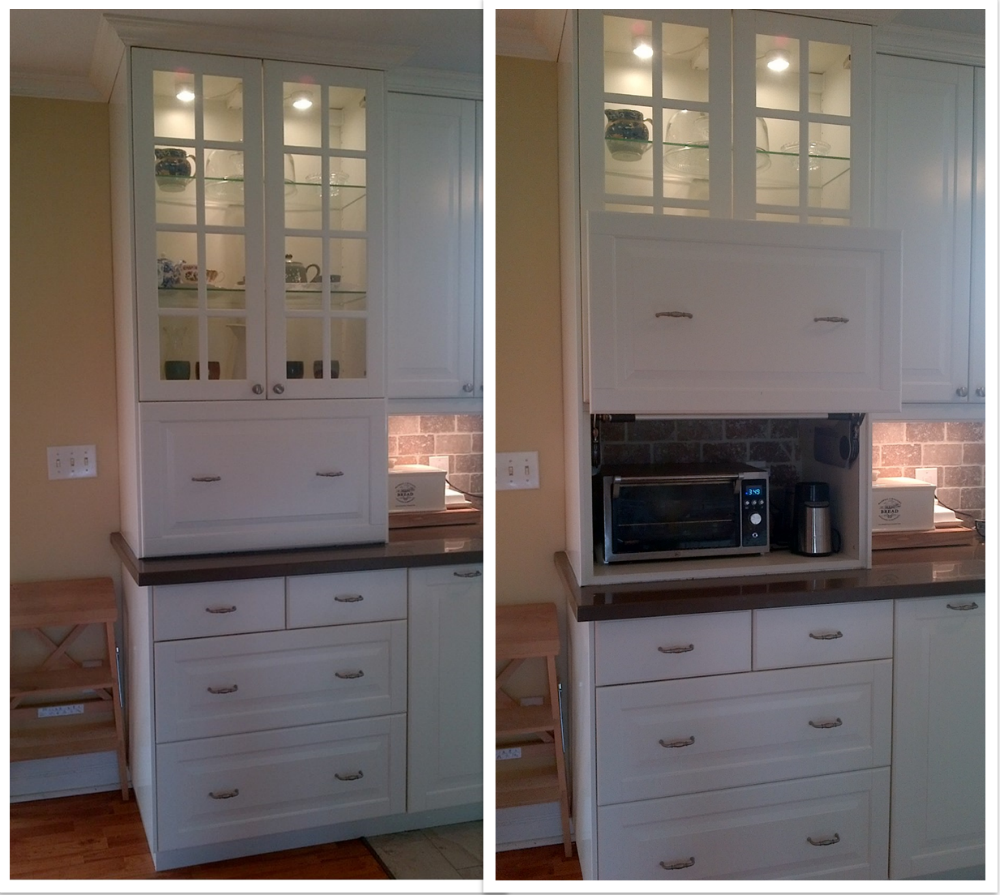
“Seamed” door styles (including their glass versions) you can use are:
- BODBYN
- ENKÖPING
Then there are the door styles that feature a grain. We do not recommend using these because when you flip the door on its side, the grain will be going in the “wrong” direction. This is true for the glass versions too.
- ASKERSUND
- HAVSTORP
- HITTARP
And, we don’t recommend using the JUTIS door, because of the built-in handle.
Instructions for making this IKEA kitchen hack
All you’ll need for this IKEA kitchen hack are:
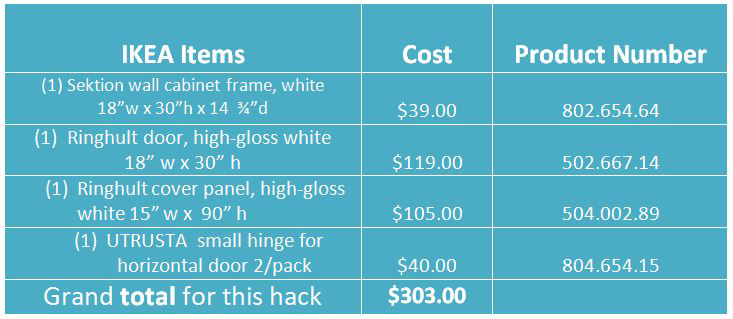
- A SEKTION wall cabinet frame, 18” x 30” x 14 ¾”
- A RINGHULT door, 18” x 30” (substitute with the door style of your choice, of course)
- UTRUSTA horizontal door hinges
- A RINGHULT cover panel, 15” x 90” (the panel should match the door style you chose)
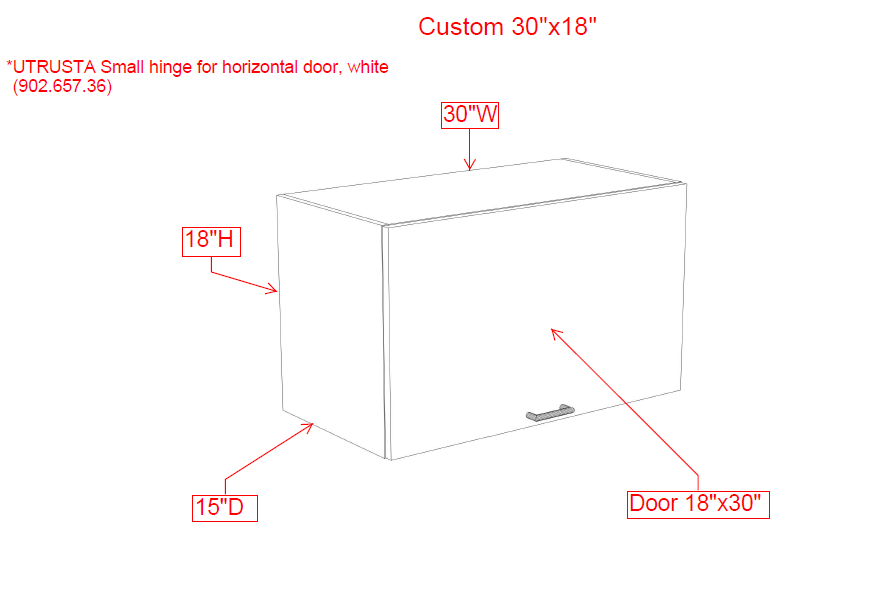
You’ll flip the cabinet frame on its side and attach the door using the horizontal door hinges. We suggest using this size cover panel so that it will cover the side of your cabinet hack and the wall cabinets above it, so there’s no seam.
If you think about it, you’re just extending the wall cabinets down to the counter.
If you are adding this cabinet to an existing kitchen, you can use a smaller cover panel, but there will be a seam. Again, we don’t think that’s a bad thing, just a detail you should know about.
Grand total for this IKEA kitchen hack
Get a Professional IKEA Kitchen Design – All Online
Work with our certified kitchen designers to get a personalized kitchen designed around your needs and vision. If you’re interested in learning more about our service, make sure to check out our IKEA Kitchen Design Services.


