
How to Add Kitchen Storage With Simple DIY Solutions
Shannon and Ernesto from Portland, Oregon asked IKD to redesign their small kitchen. It turned out to be the perfect project for showcasing some of our innovative IKEA kitchen hacks.
Your kitchen should complement the way your household functions. Don’t settle for lack of counter space or storage; chances are we can devise a solution to work within your budget and DIY skill set.
Hacking IKEA SEKTION cabinets isn’t a new concept, but you might be surprised by how creative our certified designers can be.
This article shows three examples of how we used some of our favorite hacks in this kitchen design.
IKD Hack #1: Use SEKTION Cabinets for a Microwave Shelf-Drawer
In the 1970s, microwaves offered a great way to heat leftovers and cook TV dinners. Now, they’re a tool used by even the most serious home chefs.
“We were excited about updating the kitchen, but I was most excited about getting the microwave off the counter. We need all the counter space we can get. But I didn’t think about how the change would affect the way I worked in the kitchen. I use the microwave daily to heat up food for the kids and make side dishes for family meals.
Why Design
with IKD?Why Design with IKD?
With the fridge between the microwave and the counter, I no longer had a prep or rest area directly next to the microwave or oven. I wanted to love my new kitchen, but that was holding me back. I reached out to IKD, and Merari came up with a solution that was easy enough for us to do ourselves in just a few hours.” –Shannon, IKD customer
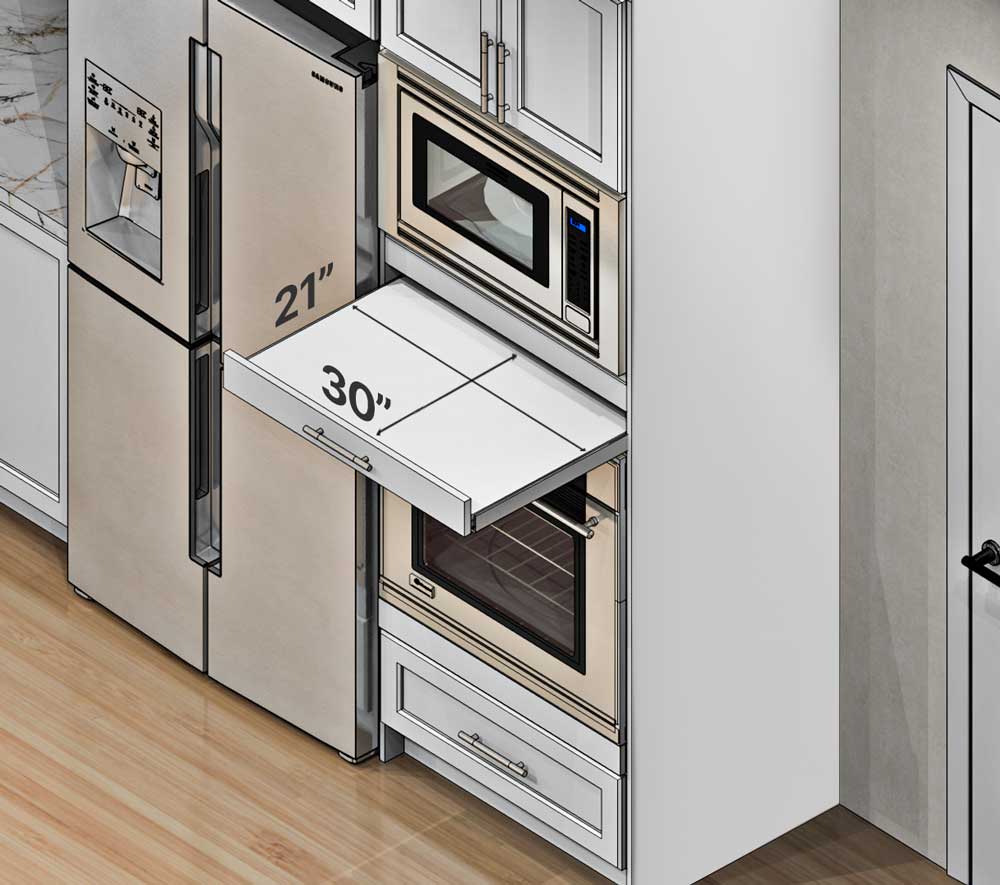
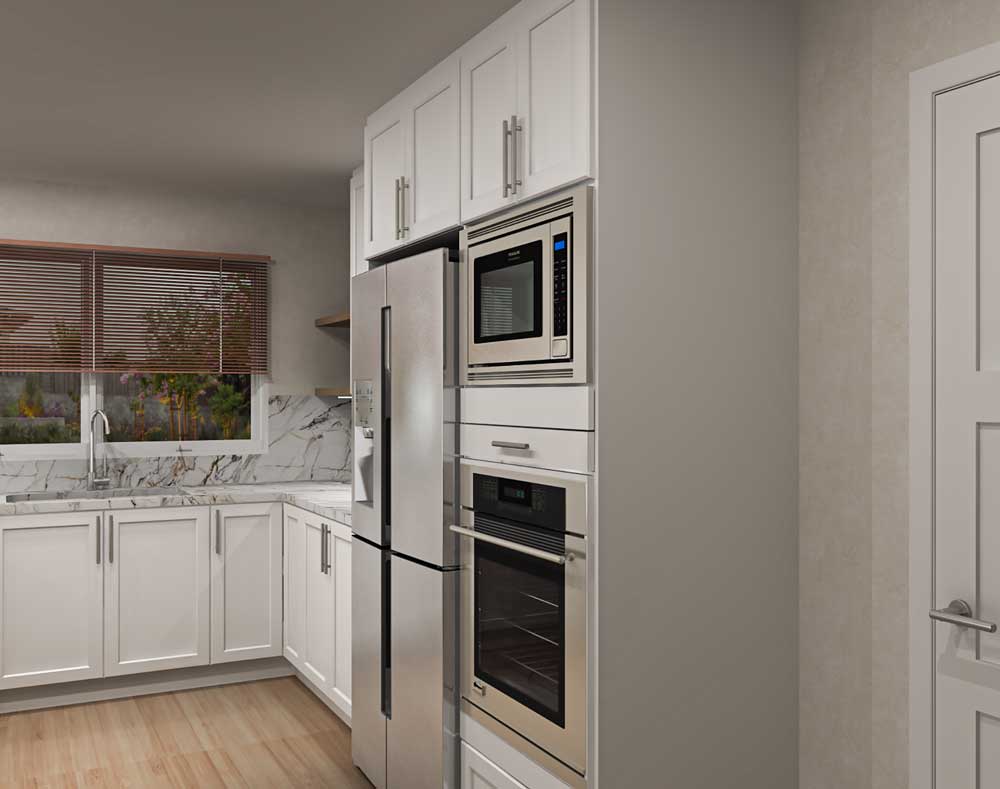
Merari’s hack started with a SEKTION High Cabinet, Oven/Microwave with two drawers and two doors.
She removed the 5” bottom drawer beneath the oven, leaving the 15” bottom drawer for storage. Then, she moved the oven’s reinforced shelf 5” down and reinstalled the drawer beneath the microwave’s reinforced shelf, creating what would appear to be a 5” drawer between the microwave and oven.
Following Merari’s detailed drawings, Shannon only had to cut an IKEA cabinet side panel to 28” x 21” and fasten it securely with adhesive silicone to the top of the 5” drawer to create the extra work surface needed.
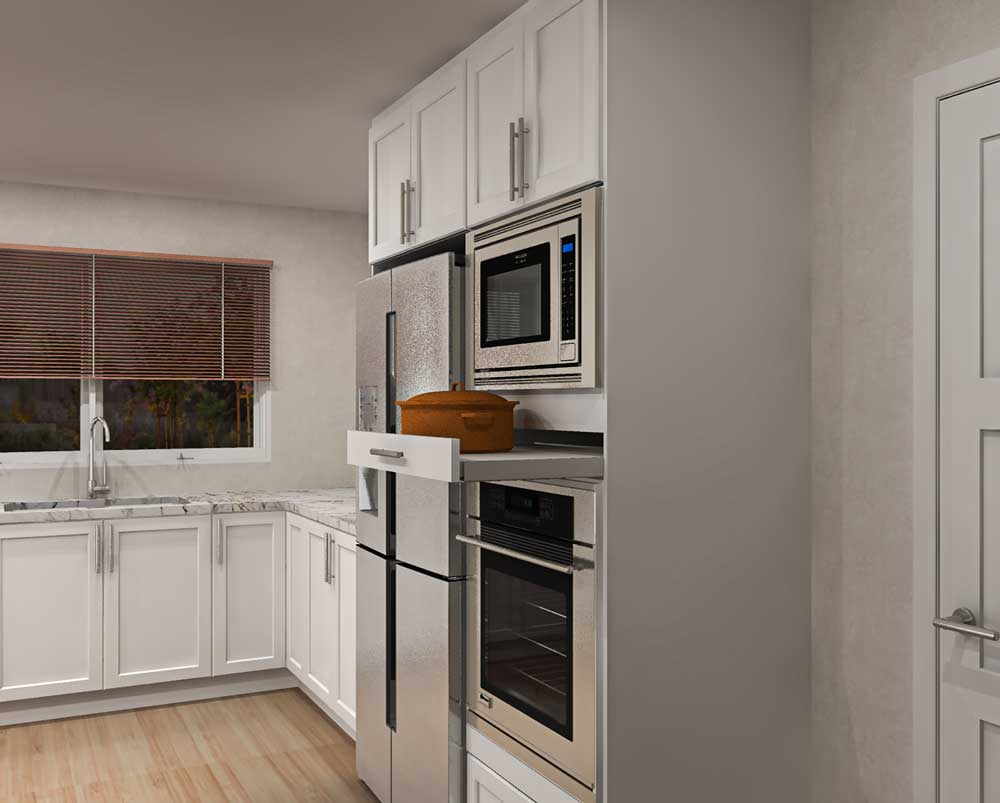
“I could not believe how simple the solution was. I would never have thought of it myself, and that’s exactly why I hired a designer.”
–Shannon, IKD customer
IKD Hack #2: How to Use a SEKTION Wall Cabinet to Create a Charging Station
Not so long ago, kids only needed a pencil and paper to do their homework. Then, computers came along. Today, kindergarteners often need Chromebooks and tablets to get the most out of school.
This reality has created two common problems:
- Too many plugs and not enough outlets
- A disorganized mess of wires
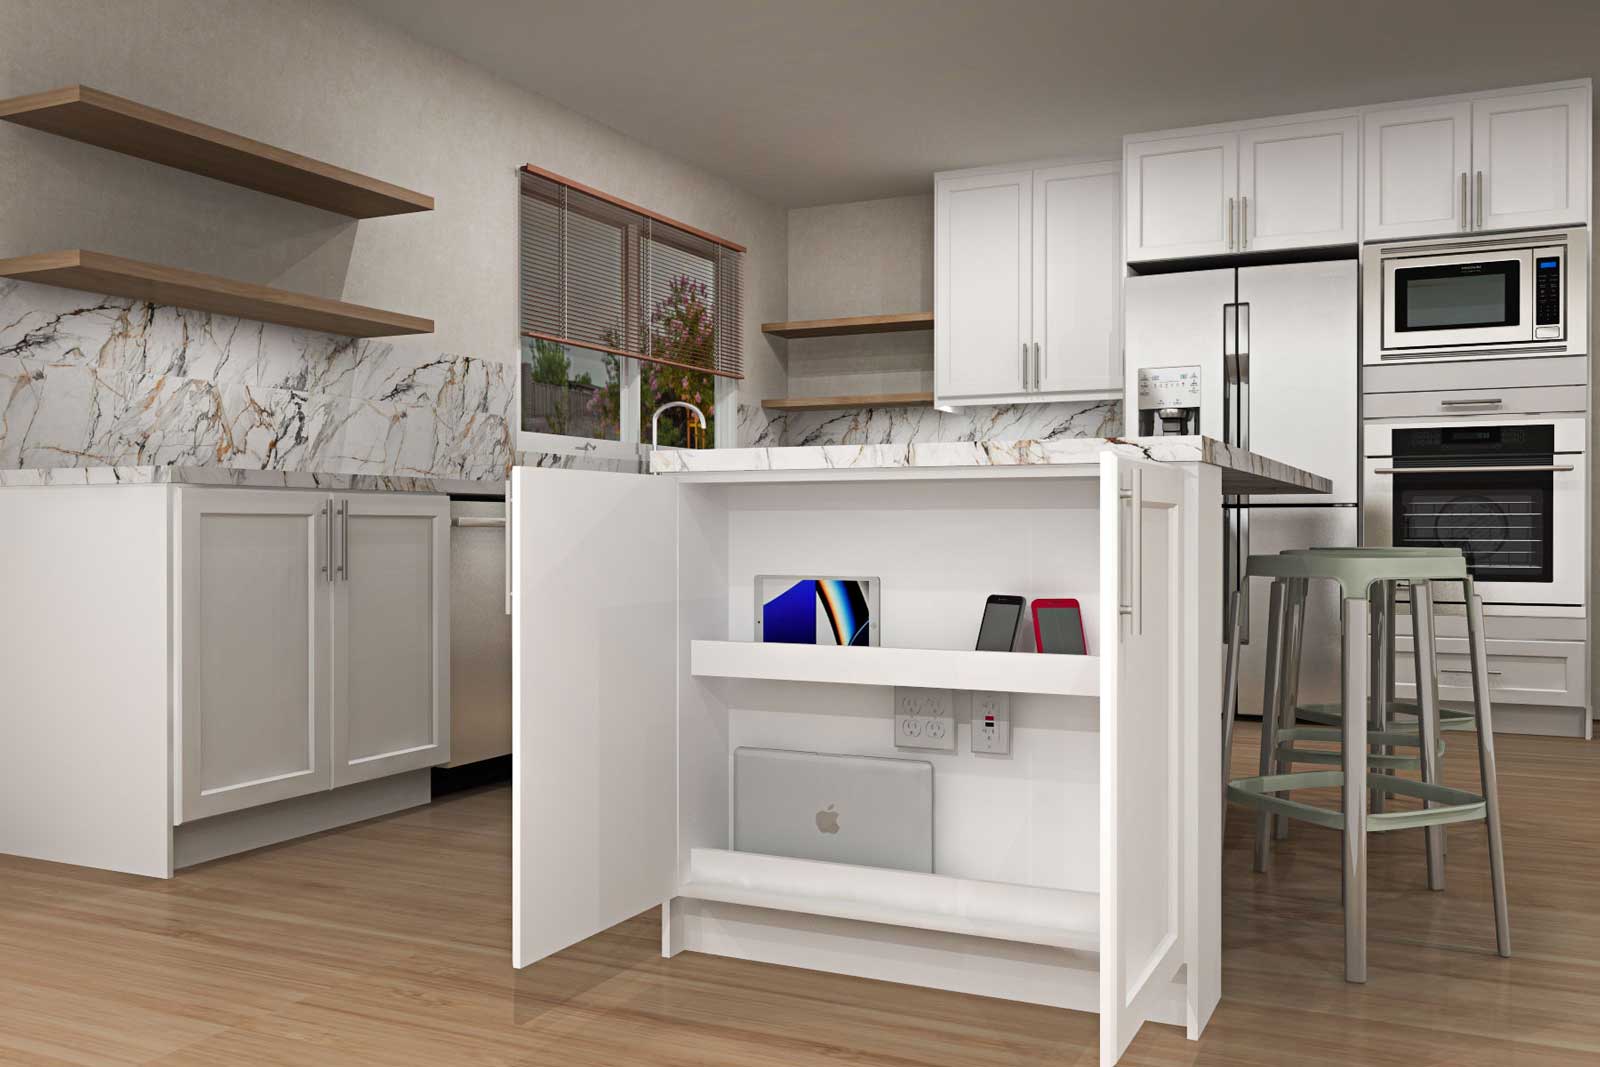
Shannon’s husband, Ernesto, wanted to ensure his new IKEA kitchen design included a neat, organized place for device charging and storage in their kitchen island.
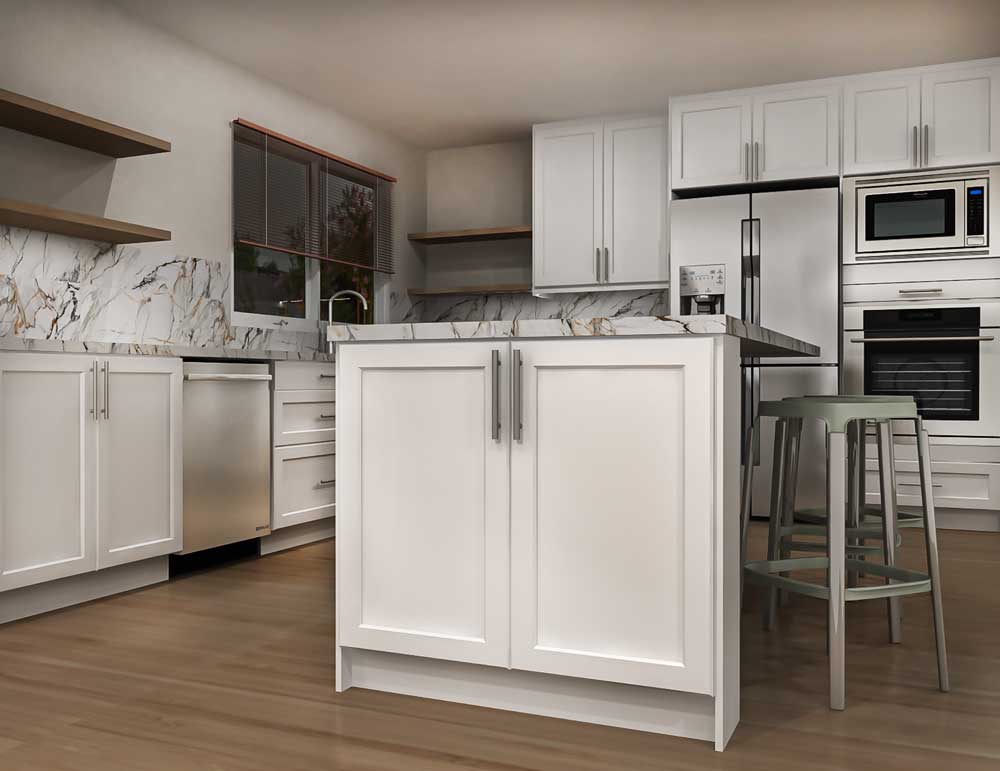
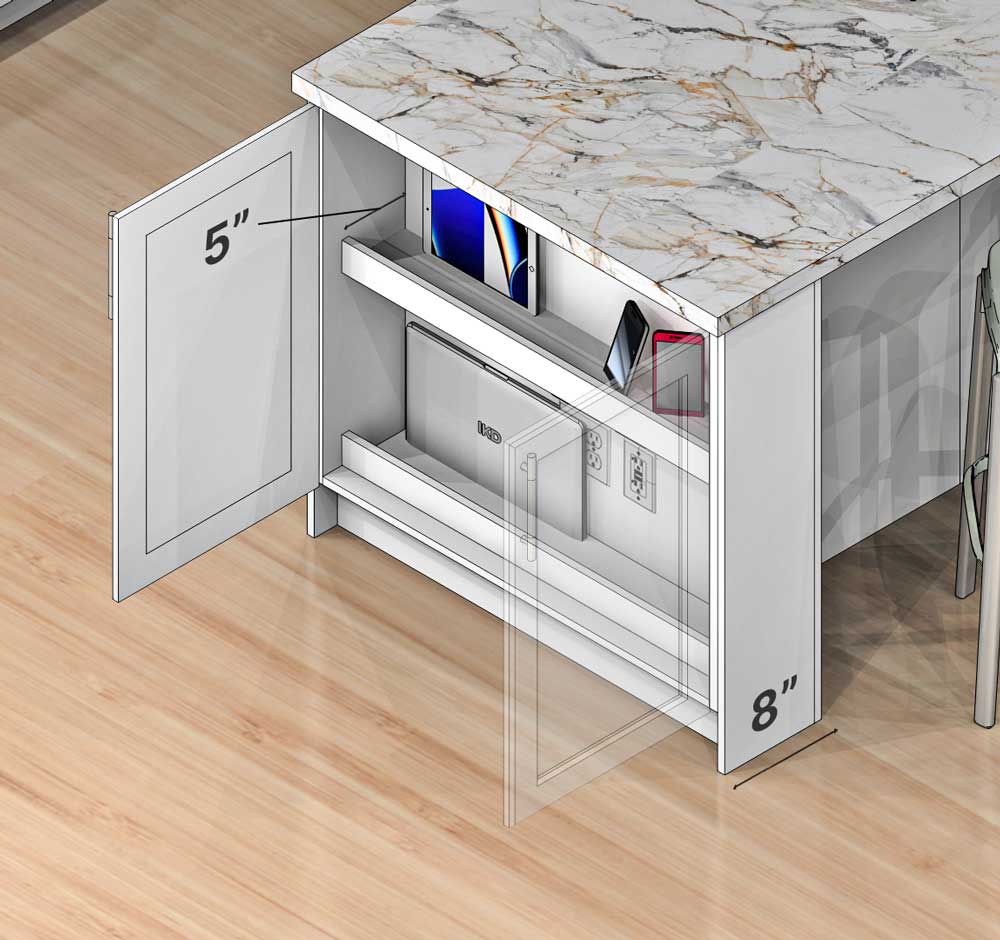
“Ernesto told me that their kids always do homework at the island, so while I was designing the new kitchen, he asked that I also create hidden device storage. I achieved this IKEA cabinet hack by reducing the depth of a 36” SEKTION wall cabinet from 12” to 8” and installing it at the side of the island.
Ernesto was determined to do most of the installation on this project himself, but he hired an electrician to put in the outlets. Then, he handled cutting the wall cabinet side panels into shelves and adding a small lip at the end to keep the devices from sliding. While he could have left it as open storage, he preferred the cleaner look of an enclosed cabinet, so he also added AXSTAD cabinet doors.”
– Merari, IKD designer

IKD Hack #3: Using IKEA Cabinets to Store Kitchen Cleaning Supplies
At IKD, we prefer to utilize every inch of storage space in our designs. We often achieve this by using filler organizers, like those sold by Rev-A-Shelf, but sometimes the best way to maximize storage is with an IKEA hack and creative design.
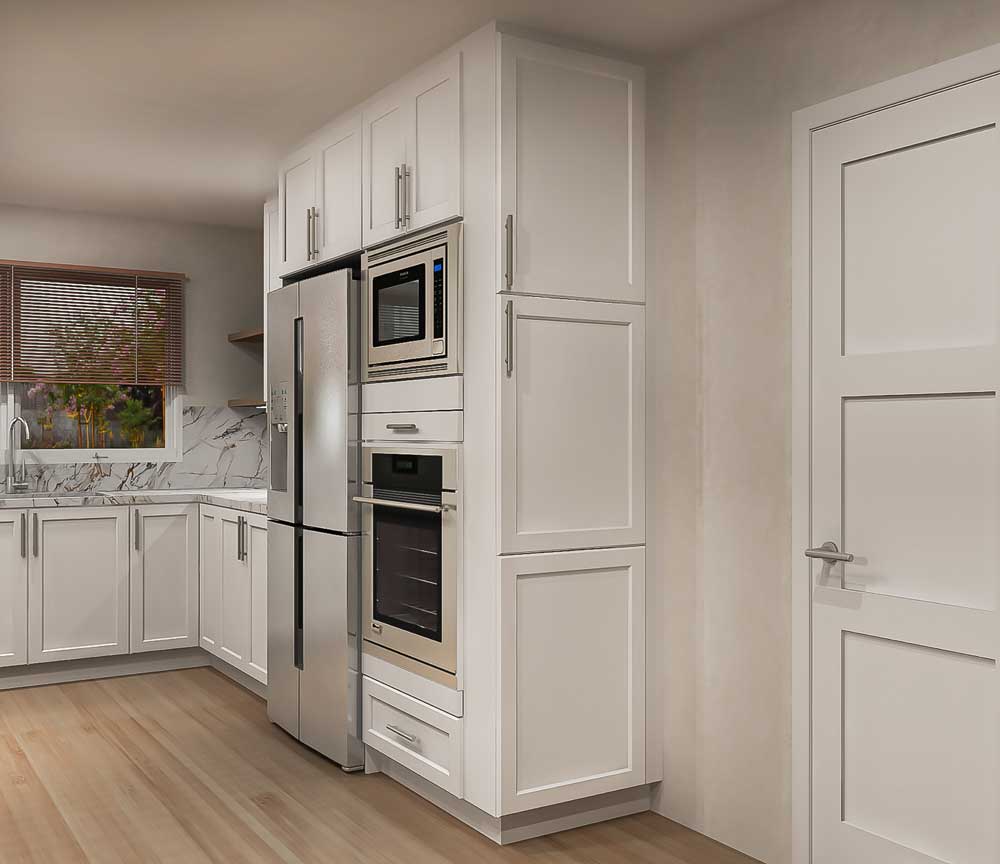
That’s exactly how we addressed Shannon and Ernesto’s last pain point: household storage.
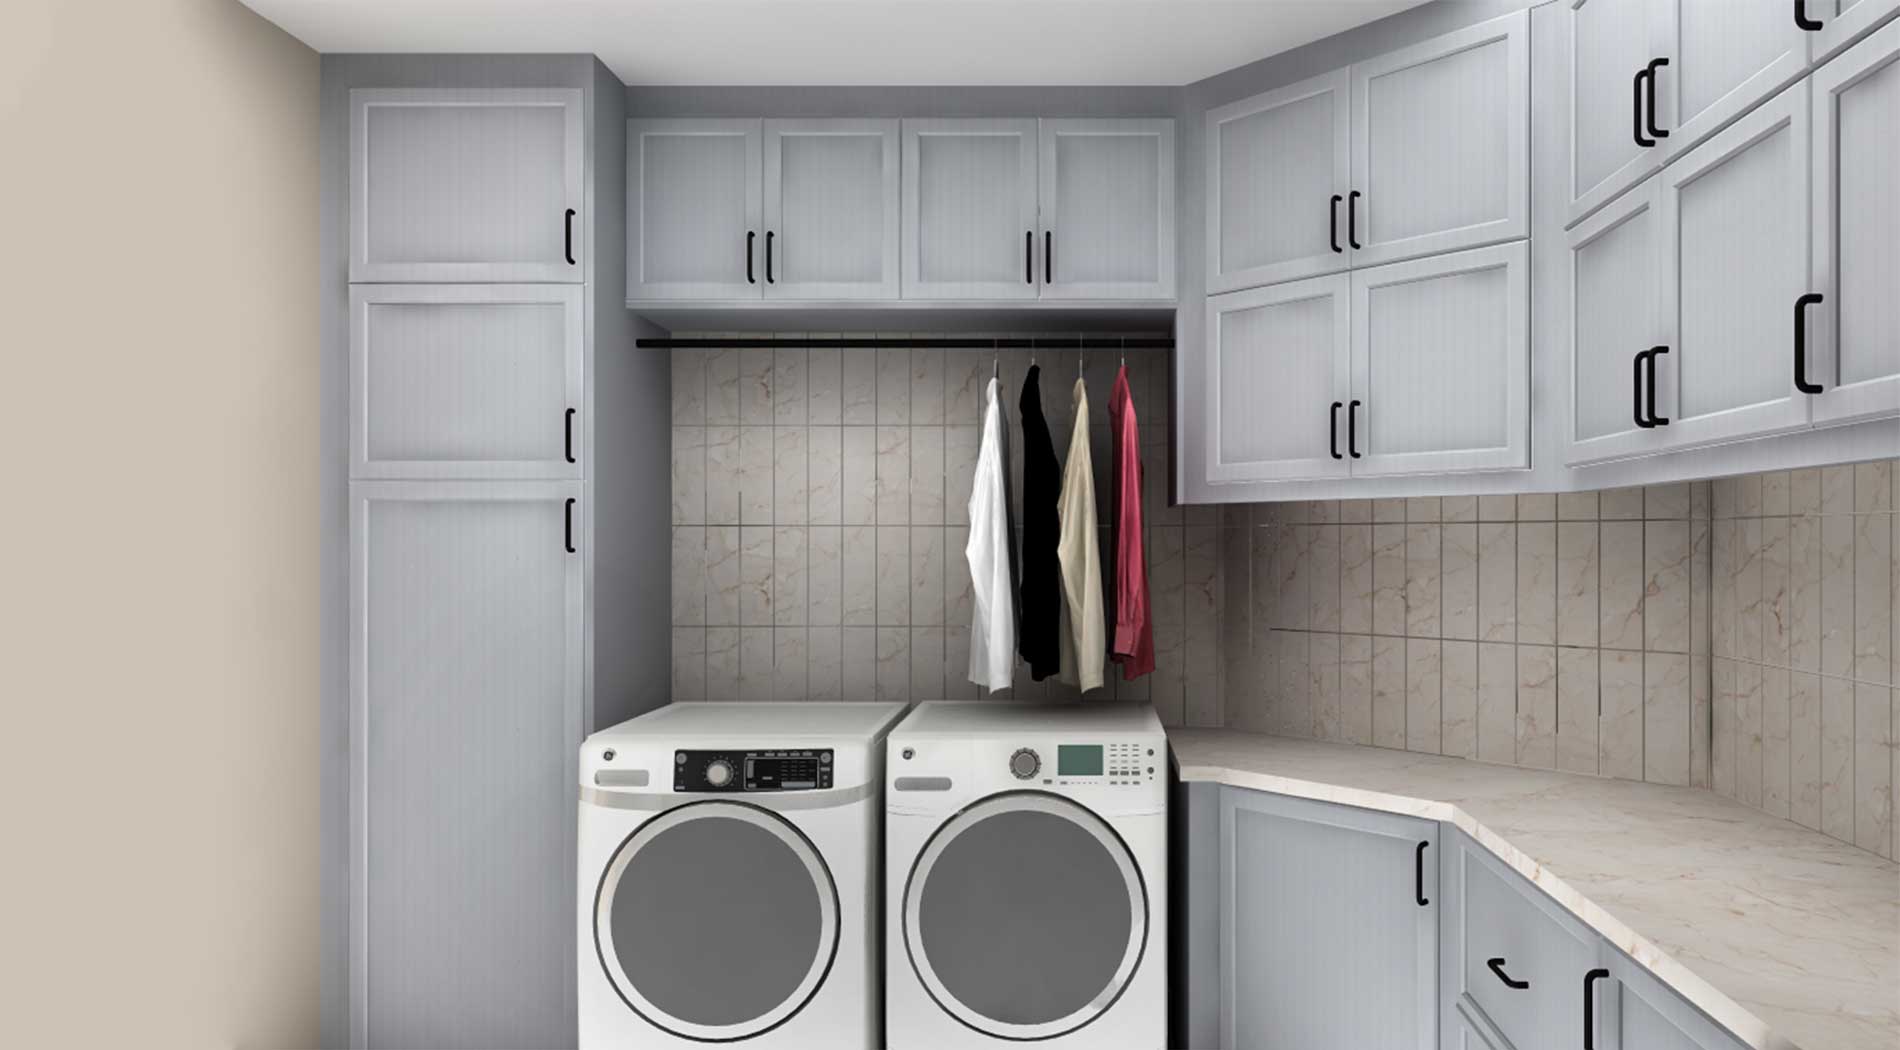
“This was something we asked for in the original design. Our laundry room is more of a closet off the kitchen. It’s sort of a catch-all for cleaning items that don’t fit beneath the kitchen sink. We asked if there was a way to include a designated cabinet for household supplies like Clorox wipes, paper towels, air freshener, laundry detergent, a step stool for the kids, etc.
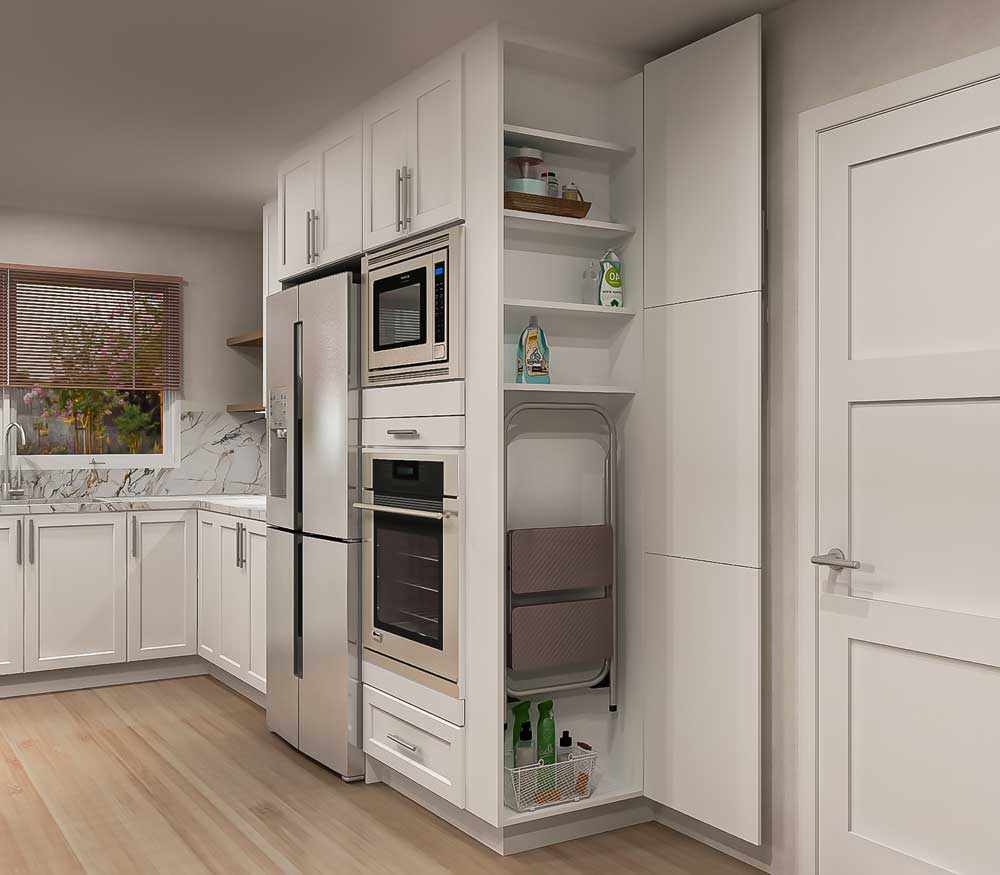
IKD came through with plans to hack a high IKEA cabinet to create an end cap, so we didn’t even have to sacrifice space elsewhere. The household cabinet is right next to the laundry room entrance, so everything in that category is in or close to the same place.”
–Shannon, IKD customer
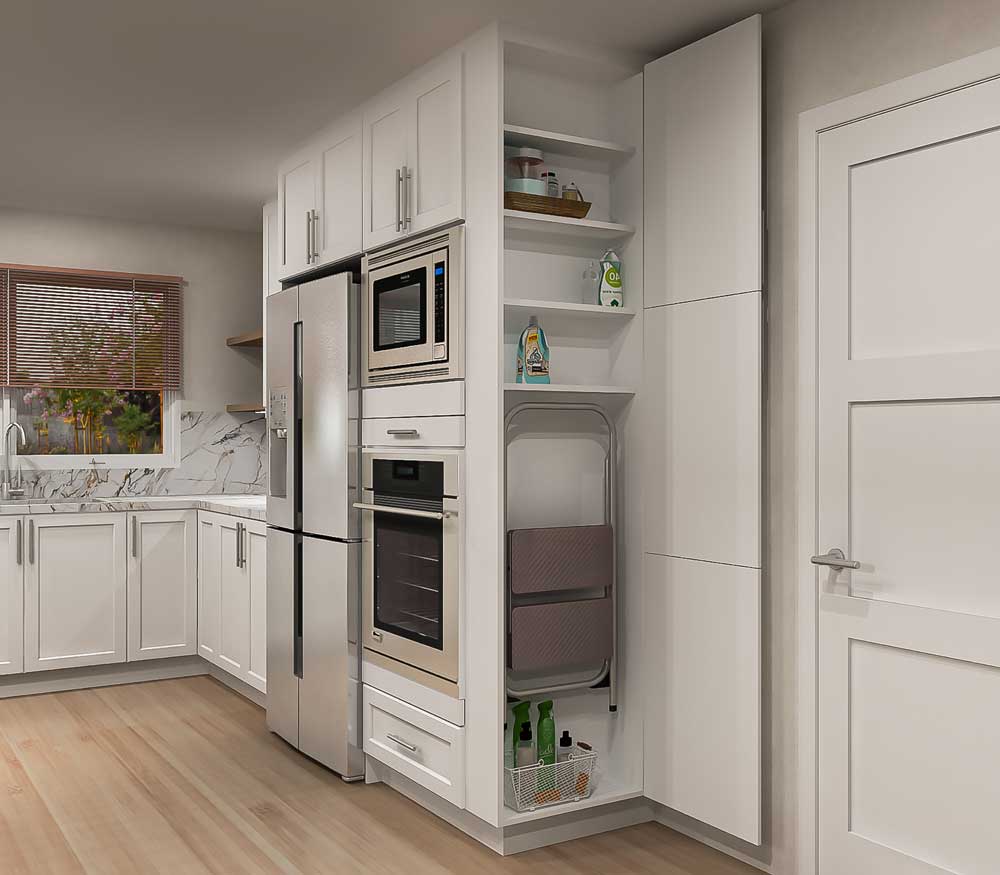
Merari created this shallow, yet functional, end cap by reducing the depth of a 90″high IKEA cabinet to 8” and the width to 21” (leaving 3” at the right side for door swing).
Her shop drawings called for cutting down a side panel to 8” to hide the side seam and using the rest of the panel to make shelves for the cabinet interior.
Using Kitchen Design Pros Simplifies the Renovation Process
Shannon and Ernesto wanted to save money by handling most of the installation themselves. They were familiar with putting the SEKTION cabinets together and researched how to install them using the rail and bumper system unique to IKEA kitchen cabinets.
(They did use professionals for the electric and plumbing changes, which we always recommend.)
While you certainly can hire an experienced installer, IKD supports DIY renovators. We provide easy-to-follow design plans, an IKEA shopping list, and detailed shop drawings that show how to execute any hacks necessary for the design.
“We appreciated Merari’s attention to detail. She made it so easy for us to save money on installation and make our kitchen work for us.”
–Shannon, IKD customer
Get a Professional IKEA Kitchen Design – All Online
Work with our certified kitchen designers to get a personalized kitchen designed around your needs and vision. If you’re interested in learning more about our service, make sure to check out our IKEA Kitchen Design Services.


