
Tips from Professional Kitchen Designers to Get Your Kitchen Remodel Right the First Time
You finalized your IKEA kitchen design. It’s time to take your list, go to the store, buy materials, and get started, right? Not just yet!

Before starting your IKEA kitchen remodeling project, use our curated checklist created by IKD’s kitchen design professionals to account for frequently overlooked details. After all, a good IKEA kitchen design is much easier to review when you have a checklist.
This article provides our top remodel tips to help you get it right the first time.
The Details of an IKEA Kitchen Remodel
The frequently overlooked details in a remodel range from minor annoyances to catastrophic structural issues. With this checklist, we aim to help you remove as many of those as possible. We’ll cover the following:
- Spacing and accessibility of kitchen counters, cabinets, and appliances.
- Planning of lighting, ventilation, and plumbing.
Why Design
with IKD?
Why Design with IKD?
Why Design
with IKD?
Why Design with IKD?
Proper Kitchen Design Spacing
Counter Space Between the Appliances and Sink
For a comfortable preparation area and enough workspace, experts suggest leaving 36” between a sink and the range and 48” between a sink and a fridge. This leaves enough space to allow people to move freely.
Corner Space for Functional IKEA Drawers and Doors
For new IKEA kitchen designers, leaving enough space in corners to open drawers and doors fully can be a hard lesson learned. Whether using a blind corner cabinet or leaving the corner empty, you need to leave three to four inches of space (with a filler or strip behind) so that the doors on both sides of the finished corner can open fully.
Placement of Cabinet Handles and Hinges
Make sure the placement of cabinet handles and hinges does not interfere with nearby windows, doors, or drawer openings.
In the past, placing the knobs or handles directly in the middle was common, which unfortunately didn’t help the cabinet doors to open easily. For wall cabinets, measure two-and-a-half to three inches from the bottom on the edge opposite the hinge. You can adjust this distance if you feel they’re too low or high for you to reach.
Proper Toe-kick Design for Kitchen Flooring Thickness
Even in new homes, level floors are a rare thing. One of the reasons for installing an IKEA toe kick is to hide any minor gaps between the flooring and the cabinets.
You might not notice how badly a floor slopes until you install base cabinets, only to discover that the dishwasher won’t fit under the countertop.
One solution is to cut out the flooring where the cabinets will be installed, leaving flooring under the dishwasher, fridge, and range. It’s easier to have a dinged-up old subfloor to work on until the very end and then install the new floor, baseboards, and paint.
It’s much harder to compute the thickness of your finished floor while your kitchen is in the planning stages. It takes an experienced IKEA kitchen designer to do it. But finalizing this detail before the remodel begins is well worth the trouble to avoid the problems mentioned above.
Calculating the Right Amount of Kitchen Flooring
A big part of an IKEA kitchen renovation project that needs to be considered or noticed is the floor—different flooring changes how you experience your kitchen. Ceramic tile looks great and can withstand heavily trafficked kitchens, but it can become slippery when water or grease splashes onto it. Vinyl flooring provides durability and affordability, but cheaper brands are subject to tearing, denting, and nicking. High-quality laminate material for your floors offers an affordable, long-lasting alternative.
To know how much to buy:
- Start by measuring the length of your floor area by the width of the floor.
- Multiply the two numbers.
- Add 5-10% to the total for cutting waste to determine the square feet of flooring you need.
When done incorrectly, flooring installation can blow up your budget by up to 25%! Take the time to calculate (and double-check) how much flooring material you’ll need.
Placement of Kitchen Appliances
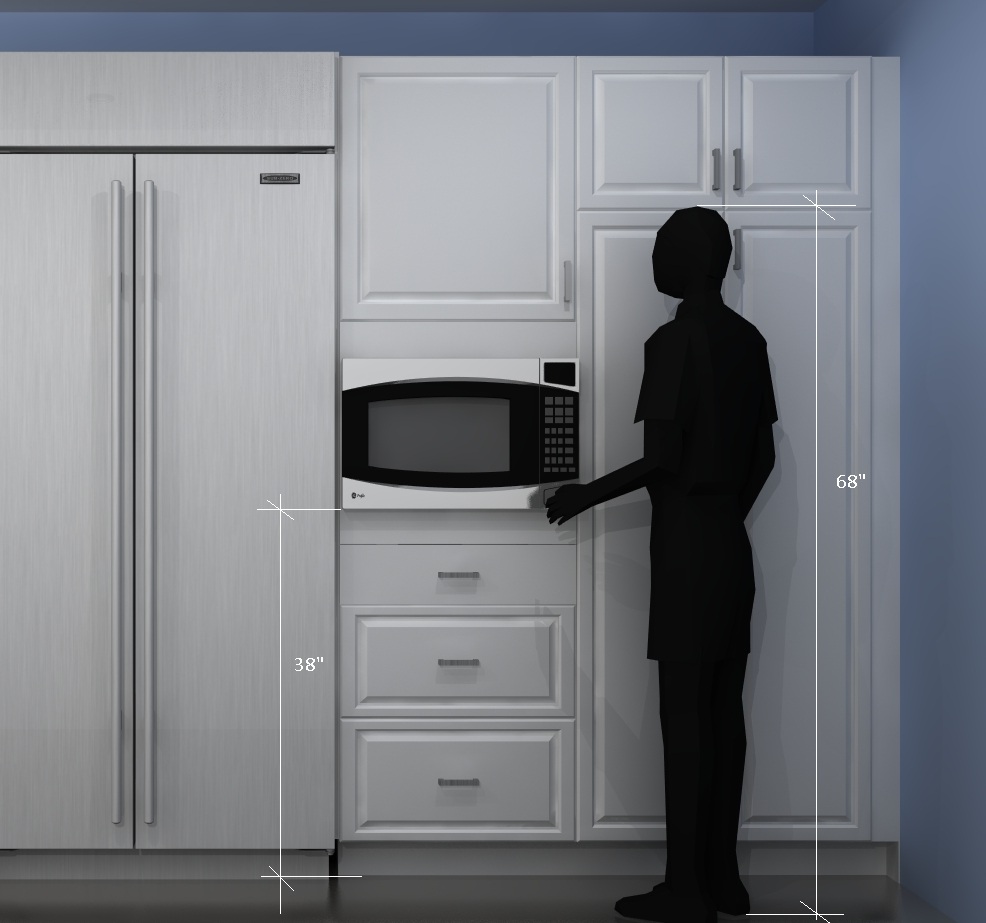
Reaching above your shoulders to pick up or remove something from a microwave oven increases the chance of losing your grip. With hot food, you have the potential for a burn. This is something a responsible designer should consider — especially when designing with children or older adults in mind. Oftentimes, placing your microwave at elbow height is the best way to go.
Lighting, Ventilation, and Plumbing in your Kitchen Design
Proper Planning for Kitchen Lights, Vents and Plumbing
A house’s pipes are mostly hidden in walls and floors. Using simple lines and plumbing symbols, you can create a good working drawing of your plumbing system before renovating your IKEA kitchen. Knowing where the pipes are located will change how your kitchen looks and can even determine the type of cabinets you’ll need.
An experienced IKEA kitchen designer will always ask for the location of your plumbing fixtures and lights before anything else. Knowing this not only helps them design where the sink will be placed but also saves you money by accommodating your design. Ultimately, you’ll spend less by utilizing existing pipe and light fixture placements. It will also help to plan for the major appliances by leaving enough space for a vent or pipe.
Sufficient Under-Cabinet Lighting
When you have enough countertop lighting, you help prevent accidents. For example, proper lighting ensures that you can see what you’re chopping on the cutting board with sharp knives.
Task lighting can be fitted under the overhead cabinets and above the sink, well out of the way of wet surfaces.
Ensure you also account for additional lighting if your kitchen has an island, peninsula, or dining table. Hanging lamps with a dimmer switch work well in those cases.
Wherever lighting is necessary, IKEA offers options for every spot.
Final Tips for a Successful IKEA Kitchen Design
We asked some of our top designers their tips when embarking on a kitchen redesign. Here are a few of their favorites:
- Look for kitchen lights that are easy to clean. Cooking and entertaining in the kitchen can be tough on even the hardiest home lighting fixtures. Fluctuating heat levels, cooking odors, ingredients, and other kitchen supplies can affect the performance of your kitchen lights over time.
- Get extra light by choosing kitchen lights that can hold high-wattage bulbs. While you may not want bright kitchen lighting throughout the entire room, you’ll want to ensure that the sink and stove areas are well-lit to clearly see the ingredients and dishes you’re using.
- Choose durable kitchen light fixtures. You may want to avoid fragile light fixtures in your kitchen if you have a young family. Consider the number of people who will be using your kitchen and the activities that occur in this room.
Let us know what you think! What other tips would you add to this list to ensure your IKEA Kitchen Design is done right the first time?
Get a Professional IKEA Kitchen Design – All Online
Work with our certified kitchen designers to get a personalized kitchen designed around your needs and vision. If you’re interested in learning more about our service, make sure to check out our IKEA Kitchen Design Services.


